Wednesday, April 23, 2014

DIY: Remodel your Living Room (on a budget!)

DIY: Remodel your Living Room (on a budget!)
BEFORE
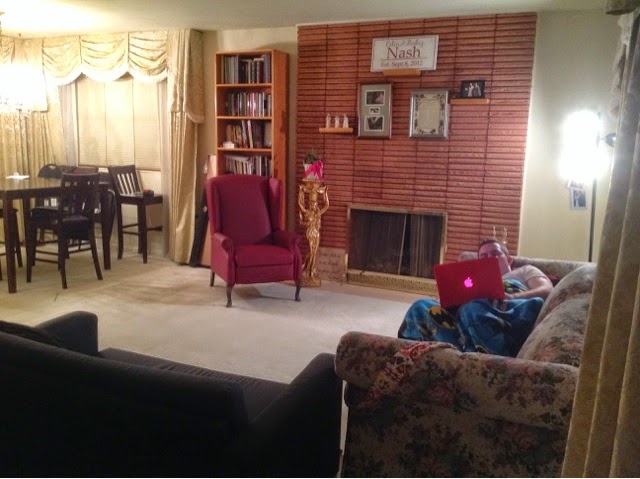
This is how our living room looked before we moved in. I liked the natural sea tones of the chairs and the cherry brick reminiscent of the Washington blossoms.  We wanted to keep the organically gothic golden elegance of the room, but throw in our own modern touches. After a few minutes of work, we turned it into this...
AFTER
Being the giver that I am, I'll go ahead and tell you some of our best secrets in Q&A form.
FAQ:
1. Q: What if you don't quite have the funding for a sectional? 
     A: three thister writes: no problem! Just grab the 2 couches you do have and slide them together. As you can see, I was pretty lucky to have a floral couch and black couch with colors that seem to pull together naturally, like a cloudy spring day.

2. Q: What if you really want a different fire place with built in book shelves and a mantle to boot?
    A: Three thister writes: Just imagine you have it with all the frills. Then the red brick will grow on you. Using your imagination on a daily basis costs you absolutely nothing!

3. Q: What do I do if I have a scantily clad golden statue woman in my living room?
    A: three thister writes: How I was hoping you would ask! I was so proud of how we integrated our statue so naturally into our new room! This calls for a couple more pictures: 
   BEFORE
AFTER
Total transformation! Keep this between us, but I'm actually working on a cute little outfit for our sweet little Broom-Hilda!

Believe it or not, my husband and I did this remodel all for the price of.... 68 cents!
Here's the break down: 
2 prong plug in with a 3 prong opening.....68 cents. 

Stay tuned for our upcoming kitchen and bathroom remodel (on a budget!)!


Monday, April 14, 2014

don't have a paint stirrer to stir my paint with

I tried to compose the title of this post so that you would land on it with a Google search if you were having this particular problem. Just one of the many courtesies you'll find here at Three Thisters.

A number of months ago, I was painting a few pieces of furniture in my garage. I realized after popping the can of paint open (worthy of a blog post in itself) that I had neglected to purchase a paint stick when I bought my paint.

This was a problem because the instructions told me to stir the paint before using and then periodically after that.

Well I don't know about you, but just as I'm sitting down to start a project is the moment I least want to have to run to the store again. I decided I was going to come up with a solution, and after digging around my house a bit, this is what I was able to come up with.

I'll be happy to share with you some directions on how to slap one of these together.

1. Gather materials.

I forgot to put scissors. I hung a lot of posters one summer and got real good at just ripping that duct tape with my fingers or my teeth. But if you need scissors for that part, use them.
 
2. Determine how tall your paint stirrer needs to be. I kinda held the knives stacked on top of each other next to the paint can to see how tall it needed to be, and I determined two knife lengths would be good.

3. Figure in reinforcement. That paint is thicker than it seems. If you were to just tape two knives together, your stirrer would probably be too flimsy. If you look real close at the picture, you'll notice a third knife taped to the back of the first two. I was glad I did this.

4. Tape the whole thing together. Don't be intimated about the tape job. Just stick the tape where it will be the most useful in holding your knives together.

We're hosting a linky party with this post, if you were able to successfully construct a paint stirrer, share it with us! Include a picture of your paint stirrer.